
The Linocut Process.
Linocut is a form of relief print which has its origins in woodblock printing. It is thought to date back to the mid 1800’s but it’s popularity grew in the early 1900’s when it was used by artists such as Pablo Picasso and Henri Matisse.
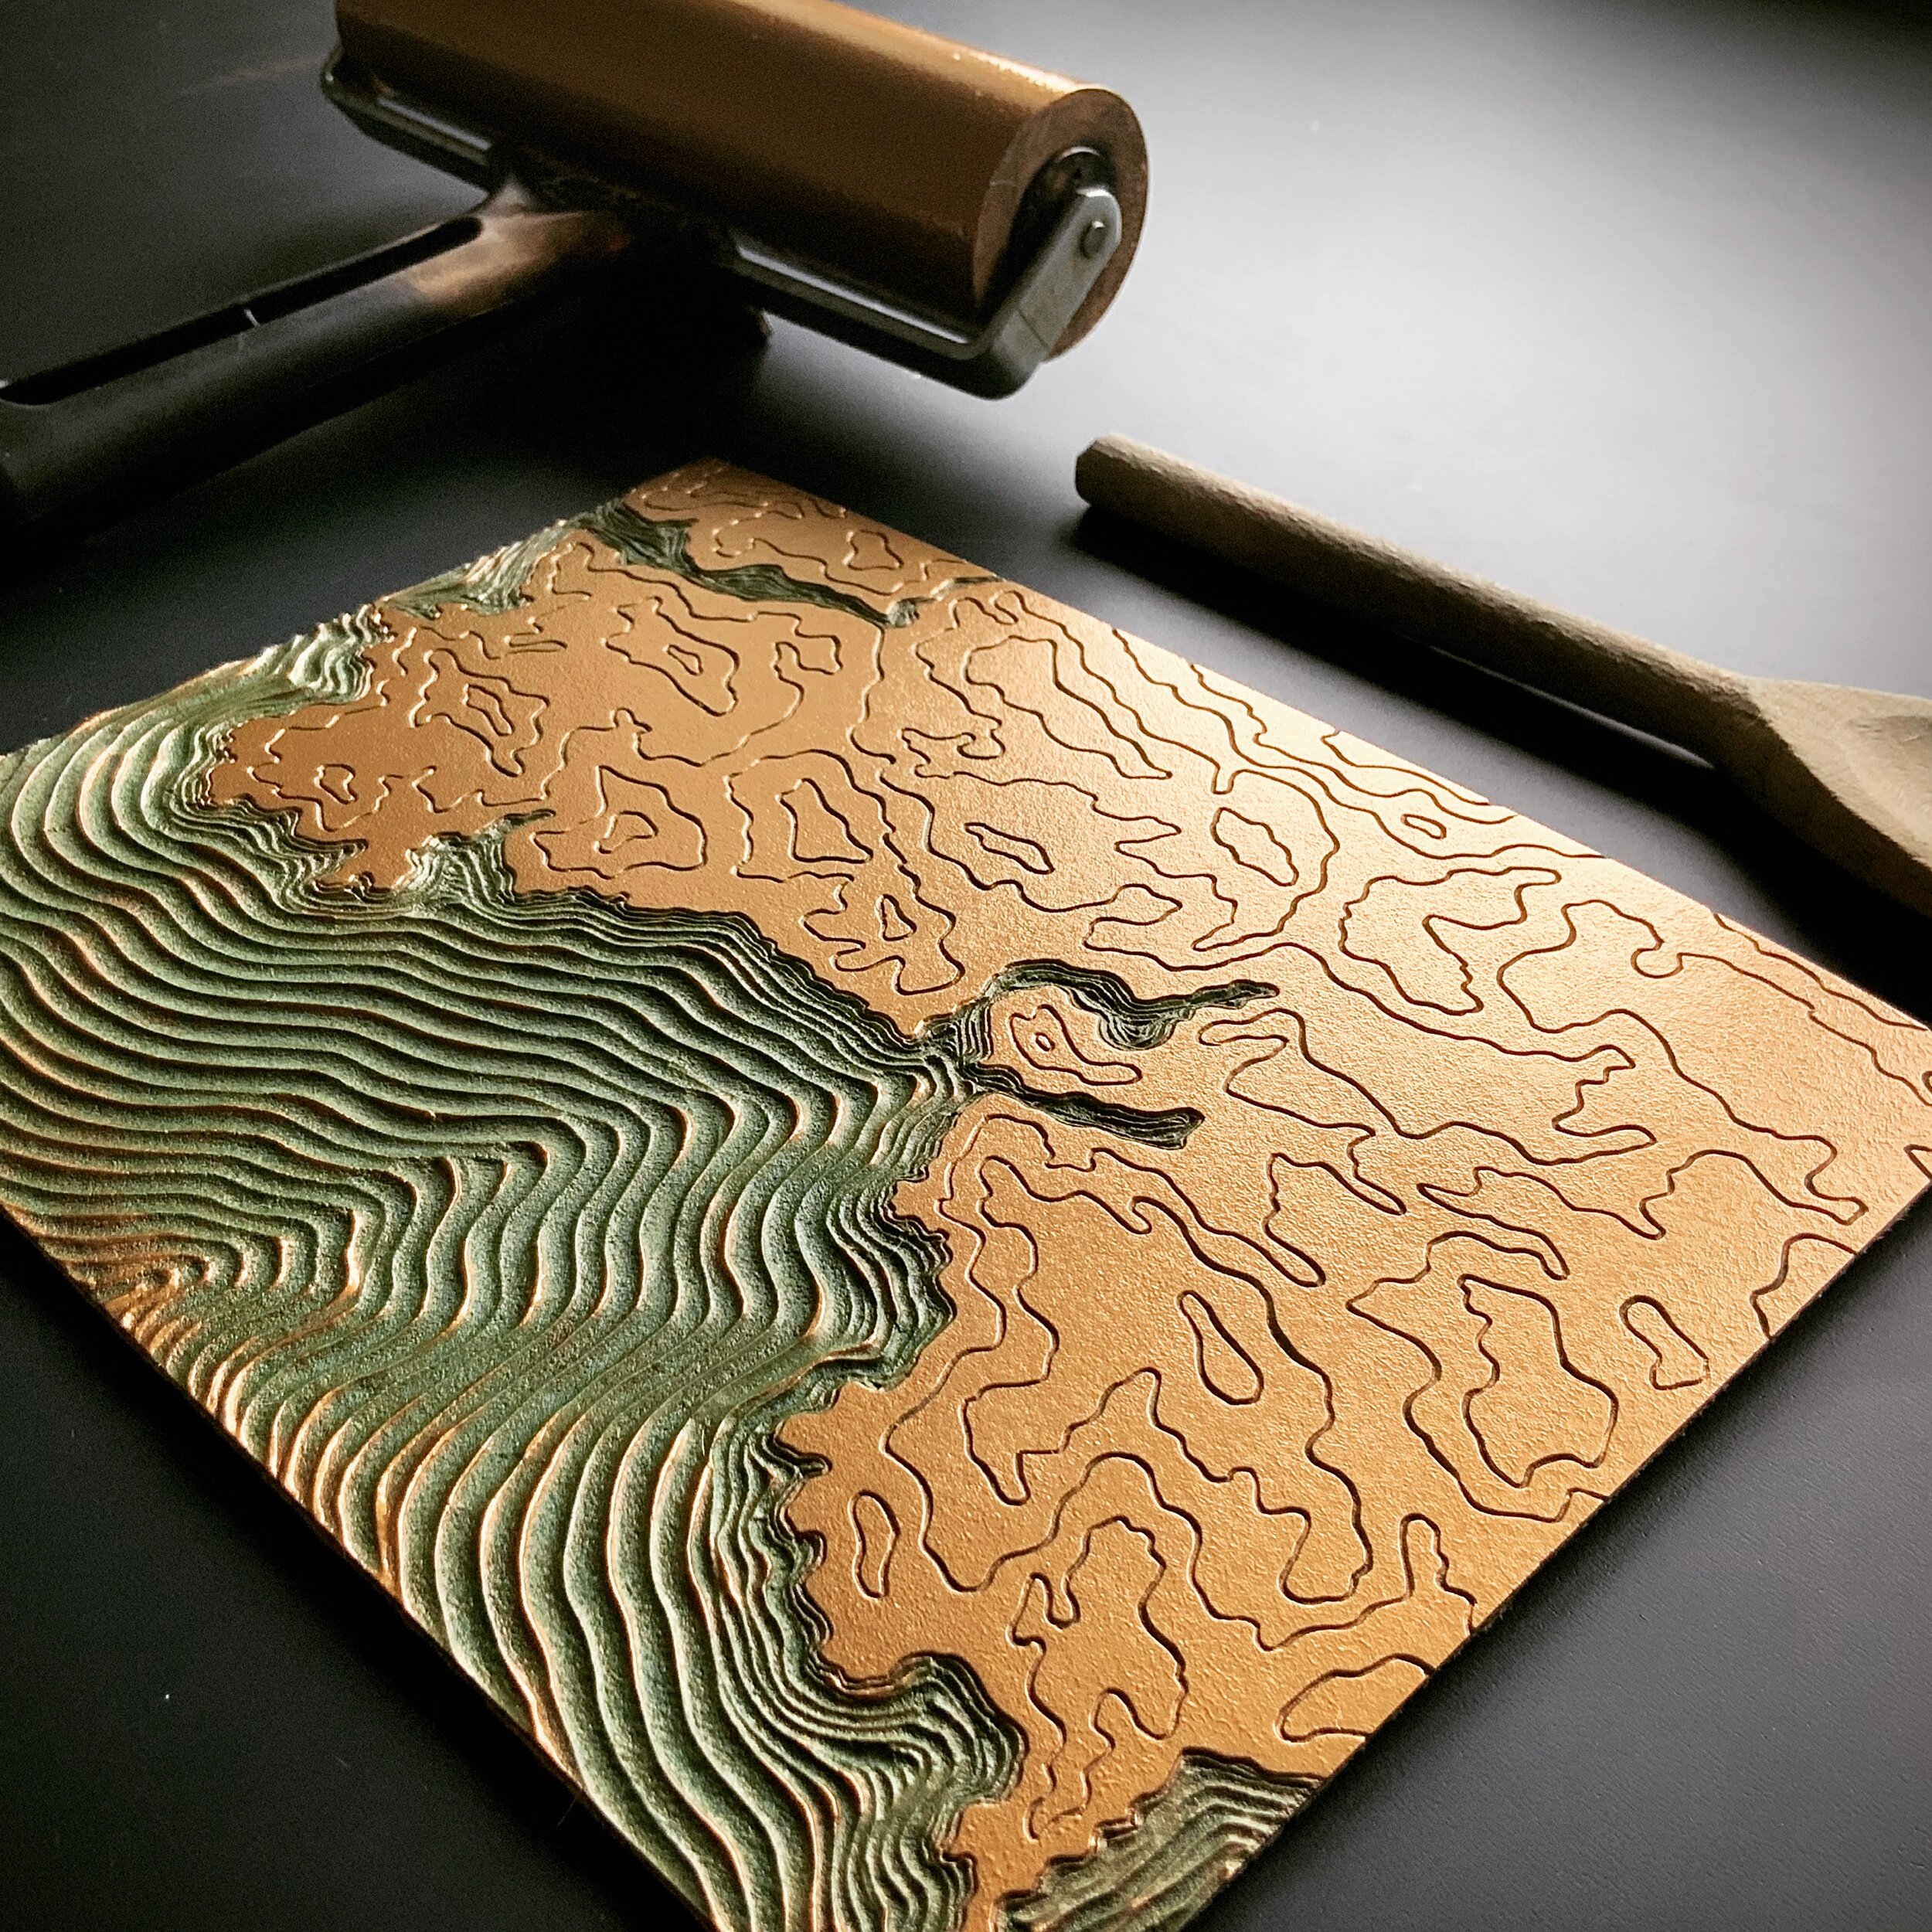
To begin a linocut print, I design and sketch an image on paper and then draw the reverse of this image onto the block of linoleum. In the case of my coastline series, I use topographical maps for reference so that I have accurate contour lines of the mountains, hills and coastline.
I then carefully carve this image into the block using special cutting tools, removing the areas that I want to stay the colour of the paper. This part of the process allows little room for error. One slip of the cutting tool could mean the end of the print, so it focuses my mind solely on the task at hand. Ink is then rolled across the uncut surface of the block. Care is taken at this stage to ensure the correct amount and consistency of ink.
Finally, paper is laid on top of the block and pressure is applied to the back of the paper using either a press or, my mother’s old wooden spoon. Many different types of paper are used for lino printing from handmade Japanese mulberry paper to cotton mouldmade paper made in Europe. The choice of paper can have a huge impact on the outcome of the final print.
When the paper is pulled away from the block, the printed image is revealed. This stage is exciting as well as a little nerve wracking as it is really only at this stage that you find out if all your hard work was worth it. For me it is an addictive process and I enjoy learning and developing all the ways this exciting medium can be used.


